Logging In and Initial Setup
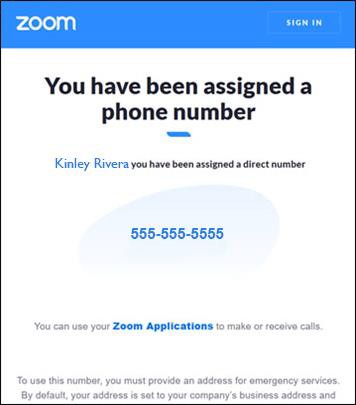
When your Zoom Phone license is assigned, you will receive an email from Zoom.
The email subject line is “[EXT] You have been assigned a direct number”. You
can use the “Zoom Applications” link at the bottom of the email to open the
Zoom web portal or you can navigate to https://zoom.us/signin
Steps 1 through 4 in this user guide are used to log into the university’s Zoom
account and not a personal Zoom account
1. Click the Zoom Applications link at the bottom of the email to open the
Zoom web portal

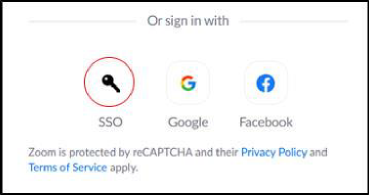
2. Click the SIGN IN button. Note, if you do not see a SIGNIN link at the top of
the page, you are already signed in

3. Scroll down and click SSO (Single Sign-On) button to sign into university’s
Zoom account
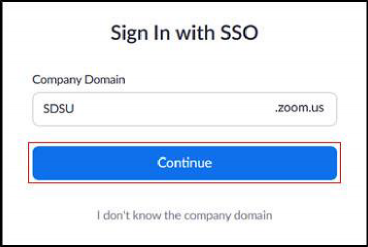
4. Enter SDSU in the Company Domain field and click Continue
Logging In and Initial Setup, Continued
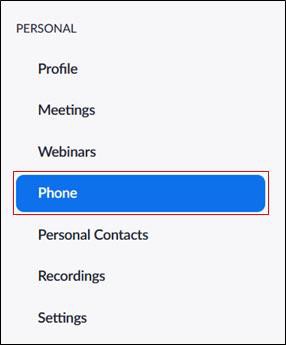
1. Once logged into the university’s Zoom account, click the Phone button
2. On the Quick Setting Your Extension of Zoom Phone page, confirm your
time zone is correct
3. The PIN code is used to check voicemail from a Polycom VVX desktop
phone. Note, you do not need a PIN to check voicemail using the Zoom app
4. Click Set to enter your area code. Note, a window appears

5. In the Set box enter your area code and click the Save button
